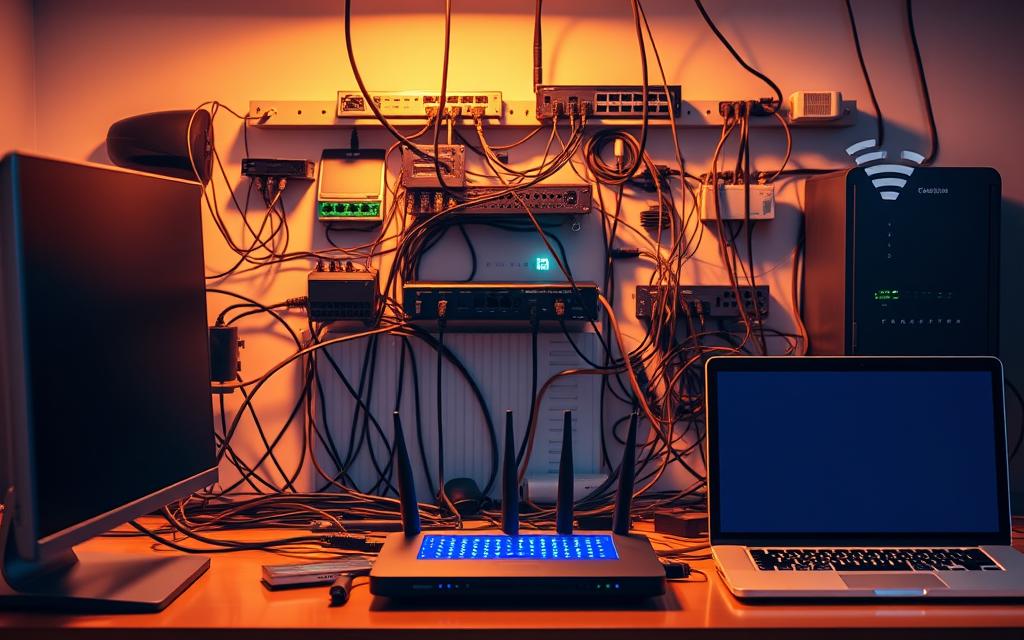
Creating a network between your computer and laptop can be a straightforward process, whether you prefer a wireless or wired connection.
With a reliable network setup, you can easily transfer files, share printers, and access resources across your devices, enhancing your productivity and workflow.
This comprehensive guide is designed for both beginners and intermediate users who want to establish a seamless connection between their computers using Windows operating systems.
By following our step-by-step instructions, you’ll be able to troubleshoot common network issues and enjoy a stable internet connection, as well as facilitate sharing between your devices.
Understanding Computer Networking Basics
Computer networking is a fundamental aspect of modern communication, enabling devices to share resources and information. In essence, a computer network allows multiple computing devices to be connected together to facilitate the sharing of data and resources.
What is a Computer Network?
A computer network is fundamentally a system that connects two or more computing devices together. This connection enables the sharing of resources and information, forming the backbone of modern digital communication. The devices within a network can include computers, laptops, smartphones, and other hardware.
Types of Networks: LAN, WLAN, and Home Networks
There are various types of networks, including Local Area Networks (LANs), Wireless LANs (WLANs), and home networks. LANs typically connect computers within a limited area, such as a home or office. WLANs perform the same function without the need for physical cables, offering greater flexibility. Home networks have become increasingly important as households now contain multiple devices that benefit from being interconnected.
Benefits of Networking Your Devices
The primary benefits of networking your devices include easy file sharing, resource sharing (like printers and scanners), centralised data storage, and the ability to access the internet from multiple devices simultaneously. Understanding the difference between peer-to-peer networks (where devices connect directly) and client-server networks (where devices connect through a central server) helps in choosing the right setup for your needs.
Modern home networks typically combine both wired and wireless connections, offering the reliability of Ethernet cables for stationary devices and the convenience of Wi-Fi for mobile devices. By understanding these basics, you can better appreciate the importance of a well-configured network in your home or office.
What You’ll Need to Create a Network

To set up a reliable network, you’ll need to gather the necessary hardware and software components. Creating a network between your computer and laptop requires careful consideration of the equipment and settings involved.
Hardware Requirements
The hardware components you’ll need include a router for multi-device setups, Ethernet cables (Cat5e or Cat6 recommended for faster speeds), and functioning network adapters in both devices. Most modern laptops and computers come with built-in Wi-Fi capabilities, but you may need to purchase a USB Wi-Fi adapter if you’re working with older equipment that lacks wireless connectivity.
Software Requirements
For software requirements, ensure both devices are running compatible operating systems. Windows devices generally network well together, but you may need additional configuration when connecting Windows with macOS or Linux systems. Additional useful tools include network discovery software and file sharing applications that come pre-installed with Windows operating systems.
Network Security Essentials
Network security is paramount. You’ll need to set up strong passwords for your Wi-Fi network (using WPA3 encryption when available) and consider enabling additional security features like MAC address filtering on your router. If you’re setting up a direct connection without a router, you’ll need to configure Windows Firewall settings to allow communication between the two devices while maintaining security.
For wireless connections, you’ll need to know your network name (SSID) and password; for wired connections, you’ll need properly functioning Ethernet ports on both devices.
How to Make Network from Computer to Laptop via Wi-Fi
Establishing a Wi-Fi network between your computer and laptop is a straightforward process that enhances device connectivity. This method allows for easy file sharing and communication between devices without the need for cables.
Connecting to an Existing Wi-Fi Network
To connect your computer and laptop to the same Wi-Fi network, start by accessing the Wi-Fi icon in the taskbar. Typically located in the bottom right corner of Windows systems, clicking on this icon will display a list of available wireless networks in your vicinity.
Accessing the Wi-Fi Icon in the Taskbar
Locate the Wi-Fi icon on the taskbar and click on it to reveal the list of available networks. This icon is usually represented by a series of waves or a signal strength indicator.
Selecting and Connecting to Your Network
From the list of available networks, select your desired network. If you’re connecting to your home network, you should recognise the network name (SSID) that you or your internet service provider set up. Click the “Connect” button below the network’s name to proceed.
Entering Network Password and Security Settings
After selecting your network, you will be prompted to enter the network’s password. This is the security key or passphrase you created when setting up your router. Enter the password and click “Next” to connect to the network.
Once both your computer and laptop are connected to the same Wi-Fi network, they should be able to communicate with each other. You may need to configure additional settings for file sharing.

Setting Up a Wireless Ad-hoc Network
If you don’t have an existing Wi-Fi network, you can create an ad-hoc wireless network directly between your computer and laptop using the “Mobile hotspot” feature in Windows 10 or 11. One device will act as the host, creating the hotspot, while the other connects to it as a client.
This method allows for direct communication between devices without a router, although it has a more limited range compared to router-based networks. To set up an ad-hoc network, go to your Windows settings, enable the mobile hotspot, and follow the prompts to configure your network settings.
Creating a Wired Network Connection with Ethernet

Ethernet cables provide a straightforward way to establish a wired network connection between devices. This method is particularly useful for tasks that require high bandwidth, such as large file transfers or online gaming.
Choosing the Right Ethernet Cable
When setting up a wired network, selecting the appropriate Ethernet cable is crucial. The most common types are Cat5e, Cat6, and Cat7, each offering different speeds and levels of interference resistance. For most users, Cat5e or Cat6 cables will suffice, providing speeds of up to 1 Gbps and 10 Gbps respectively.
Direct Computer-to-Laptop Connection
For a direct connection between your computer and laptop, you will need an Ethernet cable. Many modern devices can use standard Ethernet cables, as their network interface cards (NICs) can automatically detect the connection type.
Connecting the Ethernet Cable Between Devices
To create a direct connection, simply plug one end of the Ethernet cable into your computer’s Ethernet port and the other end into your laptop’s port. These ports are typically rectangular and labelled with a network icon.
Enabling the Ethernet Connection in Network Settings
After physically connecting the devices, you’ll need to configure network settings on both machines. This involves setting compatible IP addresses so they can communicate. We’ll cover this process in detail in Section 6.
Using a Router for Multiple Device Connections
For connecting multiple devices, using a router provides more flexibility. Plug one end of an Ethernet cable into your computer’s port and the other end into one of the router’s LAN ports, then repeat with another cable for your laptop.
Router-based setups automatically handle IP address assignment through DHCP, simplifying the configuration process. Ensure your router is properly configured with security settings like a strong admin password and updated firmware to protect your network from unauthorised access.
Configuring IP Addresses for Your Network
To establish a reliable network connection, understanding IP address configuration is essential. IP addresses serve as unique identifiers for devices on a network, enabling data to be routed correctly between them.
Understanding IP Addressing Basics
An IP address is akin to a postal address, providing a specific location for data to be sent and received. For a direct Ethernet connection between two devices, such as a computer and a laptop, static IP addresses must be configured manually since there’s no router to assign them automatically through DHCP.
Setting Static IP Addresses on Windows
To set a static IP address on a Windows device, navigate to Control Panel > Network and Internet > Network and Sharing Centre > Change adapter settings. Then, right-click on your Ethernet connection and select Properties.
Accessing Network Connections Properties
In the Properties window, select “Internet Protocol Version 4 (TCP/IPv4)” and click Properties. Then, choose “Use the following IP address” to enter your chosen IP settings.
Configuring IPv4 Settings (192.168.1.x Addresses)
For a direct connection, use complementary IP addresses in the same subnet. For example, set 192.168.1.1 on your computer and 192.168.1.2 on your laptop, with a subnet mask of 255.255.255.0.
The subnet mask defines the scope of the local network, while the default gateway is typically the router’s IP address. For direct connections, you can set the computer’s gateway to the laptop’s IP address and vice versa, or leave these fields blank.
Verifying Network Connection
After configuring IP settings on both devices, verify the connection by opening Command Prompt and typing “ping” followed by the other device’s IP address. Successful replies indicate that the network connection is working properly.
As emphasised by networking experts, “A correctly configured IP address is crucial for a stable network connection.” Ensuring that IP addresses are set correctly is vital for maintaining a reliable and efficient network.
- IP addresses function as unique identifiers for each device on your network.
- For direct Ethernet connections, manually configure static IP addresses.
- Use complementary addresses in the same subnet for direct connections.
Enabling Network Discovery and File Sharing in Windows
To share files and resources between your computer and laptop, enabling network discovery and file sharing in Windows is essential. This process involves several steps that ensure your devices can communicate with each other effectively.
Accessing Network and Sharing Centre
The first step is to access the Network and Sharing Centre. To do this, click on the Wi-Fi network icon on the right side of your taskbar, select “Properties” under your connected network, and then navigate to the Network and Sharing Centre.
On the right side of your taskbar, click the Wi-Fi network icon. Under the name of your Wi-Fi network that you’re connected to, select “Properties”. Then, go back to your Network connections window. In the Address bar, click on “Network and Internet”, and then click on “Network and Sharing Centre” in the main window.
Setting Network Profile to Private
Ensuring your network profile is set to “Private” is crucial because Windows applies stricter security settings to public networks, which can prevent device discovery and file sharing. To set your network profile to Private, select “Private” under Network profile.
Configuring Advanced Sharing Settings
To configure advanced sharing settings, navigate to the Network and Sharing Centre, and then click on “Change advanced sharing settings” on the left-hand menu. In the advanced sharing settings window, expand the “Private” profile section.
Turning On Network Discovery
Make sure “Turn on network discovery” is selected, and “Turn on automatic setup of network-connected devices” has a check mark next to it. This setting allows your devices to discover and communicate with each other.
Enabling File and Printer Sharing
Ensure that “Turn on file and printer sharing” is selected. This option enables you to share files and printers across your network.
Setting Up Password Protected Sharing
Password-protected sharing adds an extra layer of security by requiring users to enter valid Windows account credentials before accessing shared resources. Enable or disable this option based on your security preferences.
After making these changes, click “Save changes” and restart your computer if prompted. These settings need to be configured on both your computer and laptop to establish proper communication.
| Setting | Description |
|---|---|
| Network Discovery | Allows devices to discover and communicate with each other |
| File and Printer Sharing | Enables sharing of files and printers across the network |
| Password Protected Sharing | Adds an extra layer of security for shared resources |

By following these steps, you can enable network discovery and file sharing in Windows, allowing your devices to communicate and share resources effectively.
Sharing Files and Folders Between Networked Devices
Once your computer and laptop are networked, sharing files and folders becomes a straightforward process. Windows File Explorer provides a user-friendly interface to control what content is accessible across your network.
Using File Explorer to Share Content
To share a folder, open File Explorer, navigate to the desired folder, right-click on it, and select “Properties.” Then, click on the “Sharing” tab to access the sharing options.
Right-clicking to Access Sharing Options
For basic sharing, click “Share” and select the users you want to grant access to. You can choose specific Windows user accounts or select “Everyone” to make the folder accessible to anyone on your network.
Setting Specific Sharing Permissions
Advanced sharing options allow you to set specific permissions for different users, controlling whether they can only read files, modify existing files, or create new files within the shared folder.
Accessing Shared Files from Another Computer
To access shared files from your other device, open File Explorer and click on “Network” in the navigation pane. If network discovery is properly enabled, you should see the other computer listed.
Browsing Network Locations
Browse through the available network locations to find the shared files you need.
Mapping Network Drives for Easy Access
For more convenient access to frequently used shared folders, consider mapping a network drive by right-clicking on the shared folder and selecting “Map network drive.” This assigns a drive letter for quick access.
When sharing sensitive data, remember to set appropriate permissions and consider using password-protected sharing to prevent unauthorised access, especially if your network includes multiple users.
- Use File Explorer to share files and folders between your networked computer and laptop.
- Right-click on a folder to access sharing options and set specific permissions.
- Access shared files by clicking on “Network” in File Explorer.
- Map network drives for easy access to frequently used shared folders.
Setting Up Printer and Resource Sharing

To streamline your printing tasks, setting up a shared printer on your network is a straightforward process that offers considerable convenience. This not only eliminates the need for duplicate hardware but also allows both your computer and laptop to print documents without physically reconnecting cables.
Sharing a Printer on Your Network
To share a printer connected to your computer, navigate to Settings > Devices > Printers & scanners, select the printer you want to share, click “Manage,” and then enable the “Share this printer” option. It is crucial that the computer with the directly connected printer remains powered on for other devices to access it—this “host” computer acts as a print server for the network.
Connecting to a Shared Printer
To connect to a shared printer from your laptop, go to Settings > Devices > Printers & scanners, click “Add a printer,” and Windows should automatically discover shared printers on your network. This makes it easy for users to print from any device connected to the network.
Sharing Other Devices and Resources
Beyond printers, you can share other resources like scanners, external hard drives, and media devices using similar methods—right-click the device in File Explorer and look for sharing options. For multimedia sharing, Windows Media Player includes built-in options to share music and video libraries across your network, accessible through the “Stream” menu. When sharing resources, consider creating specific user accounts with appropriate permissions rather than using the “Everyone” group, especially in environments where multiple people might access your network.
Troubleshooting Common Networking Issues
Networking issues can be frustrating, but troubleshooting can help resolve them efficiently. When you’re unable to connect to a network or share files between devices, identifying the root cause is crucial.
Diagnosing Connection Problems
To diagnose connection problems, start by checking your network cables and Wi-Fi settings. Ensure that your router is functioning correctly and that your devices are connected to the same network.
- Verify that network discovery is enabled on both machines.
- Check that your devices are connected to the same network (either the same Wi-Fi network or properly connected via Ethernet).
Resolving IP Address Conflicts
IP address conflicts occur when two devices are assigned the same IP address. To resolve this, check and reconfigure the IP settings on both devices to ensure each has a unique address.
| Device | IP Address | Status |
|---|---|---|
| Computer 1 | 192.168.1.100 | Active |
| Computer 2 | 192.168.1.101 | Active |
Fixing Network Discovery Issues
Network discovery issues can be resolved by checking your Windows Firewall settings and ensuring that the necessary network features are allowed. You can do this by searching for “Windows Defender Firewall” in the Start menu.
Checking Firewall Settings
Make sure that your firewall is not blocking network discovery and file sharing. You can check this by ensuring that the necessary network features are allowed in the Windows Defender Firewall settings.
Restarting Network Services
For persistent issues, try restarting network-related services by opening Services (search for “services.msc” in the Start menu) and restarting services like “DHCP Client,” “DNS Client,” and “Network Connections.”
Updating Network Drivers
Outdated network drivers can cause connectivity problems. Update them by right-clicking on the network adapter in Device Manager, selecting “Update driver,” and following the prompts.
As noted by a networking expert, “Regularly updating network drivers can significantly improve network stability and performance.”

By following these steps, you can troubleshoot and resolve common networking issues, ensuring a stable and efficient network connection.
Conclusion
By following the steps outlined in this guide, you can successfully network your computer and laptop, enabling seamless file transfers and shared resource access.
Creating a network between your devices opens up numerous possibilities for improved workflow efficiency in both home and office environments. Whether you’ve chosen a wireless or wired connection, the fundamental principles of networking remain the same.
To maintain network security, remember to use strong passwords, keep your operating systems and drivers updated, and be mindful of what resources you share and with whom. As technology evolves, Windows regularly updates its networking features, so check for the latest updates to ensure you’re benefiting from the most recent improvements.
With your computer and laptop now successfully networked, you can enjoy collaborative work and many other benefits. For more complex networking needs, consider exploring advanced features like VPN connections or network-attached storage (NAS) devices to further enhance your home or office network.
FAQ
What are the benefits of networking my computer and laptop?
Networking your devices enables you to share files, printers, and other resources, making it easier to work and collaborate. It also allows you to access the internet from multiple devices.
What type of network should I use for my home devices?
For most home users, a Wireless Local Area Network (WLAN) is the most convenient option, as it allows devices to connect without the need for cables. However, if you require a more stable connection, a Local Area Network (LAN) using Ethernet cables may be a better choice.
How do I secure my network from unauthorised access?
To secure your network, use a strong password for your router, enable encryption (such as WPA2), and set up a firewall on your devices. Regularly updating your router’s firmware and using antivirus software can also help protect your network.
Can I connect my computer and laptop using an Ethernet cable?
Yes, you can connect your devices directly using an Ethernet cable. However, you’ll need to configure the IP addresses on both devices to enable communication between them. Alternatively, you can use a router to connect multiple devices.
Why can’t I see my shared files from another computer?
Ensure that network discovery and file sharing are enabled on both devices, and that the shared files are located in a shared folder. You may also need to configure the firewall settings to allow file sharing.
How do I troubleshoot common networking issues?
Start by checking the physical connections, restarting your router, and verifying the IP addresses on your devices. You can also use the built-in network troubleshooting tools in Windows to diagnose and resolve issues.
Can I share a printer between multiple devices on my network?
Yes, you can share a printer on your network by connecting it to one device and enabling printer sharing. Other devices on the network can then access the shared printer.
What is the difference between a static and dynamic IP address?
A static IP address is a fixed address assigned to a device, while a dynamic IP address is assigned by the router using DHCP. Static IP addresses are useful for devices that require a consistent address, such as printers or servers.

 By
By